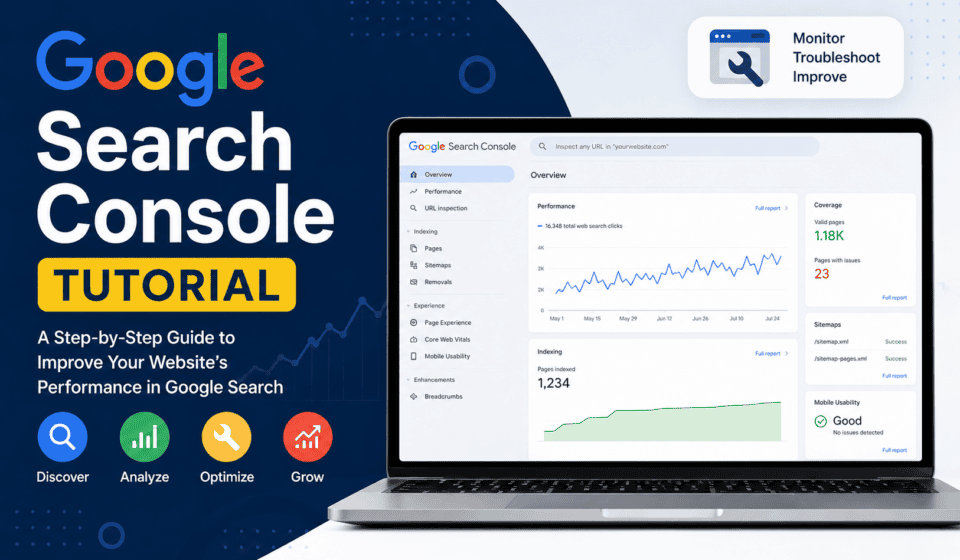

Google Search Console (GSC) is one of the most important free tools for website owners, bloggers, SEO professionals, web designers, and digital marketers. It helps you understand how your website appears in Google Search, identify indexing problems, monitor organic search performance, and discover opportunities to improve your SEO.
Whether you have a WordPress website, business website, blog, portfolio, or online store, learning how to use Google Search Console can give you valuable information about how Google discovers and understands your website.
In this Google Search Console tutorial, you will learn how to set up Search Console, verify your website, submit your sitemap, check indexing, analyze search performance, inspect URLs, identify SEO problems, and use the data to improve your website.
What Is Google Search Console?
Google Search Console is a free service from Google that helps website owners monitor and troubleshoot their website’s presence in Google Search.
It provides information about search queries, clicks, impressions, average position, indexing, crawling, Core Web Vitals, structured data, and other search-related issues.
For example, you can use Google Search Console to answer questions such as:
- How many people are finding my website through Google?
- Which keywords are bringing visitors to my website?
- Which pages receive the most organic traffic?
- Is Google indexing my pages?
- Why isn’t a particular page appearing in Google?
- Are there technical problems affecting my website?
- How many times are my pages appearing in search results?
- Which pages have a high number of impressions but few clicks?
- Are there mobile or Core Web Vitals problems?
- Has Google detected security or manual-action issues?
Unlike Google Analytics, which focuses heavily on what visitors do after reaching your website, Search Console focuses on how your website performs in Google Search.
Why Is Google Search Console Important for SEO?
Google Search Console should be part of your regular SEO workflow.
One of its biggest advantages is that it gives you data directly related to Google Search. The Performance report shows information such as clicks, impressions, click-through rate (CTR), average position, queries, pages, countries, and devices.
This information can help you make better SEO decisions.
For example, imagine one of your blog posts receives 10,000 impressions but only 100 clicks. That tells you that Google is showing the page frequently, but users aren’t clicking at a high rate.
You could then review the page’s title and meta description to make them more relevant and attractive to searchers.
Similarly, if a page ranks around positions 8–15 for several relevant keywords, improving the content, internal links, search intent, and on-page SEO may help it become more competitive.
Search Console is therefore not just an error-reporting tool. It can also be an important source of SEO opportunities.
How to Set Up Google Search Console
Setting up Google Search Console is relatively simple.
Step 1: Sign in to Google Search Console
Visit the official Google Search Console website and sign in using your Google account.
You need a Google account to use Search Console, and you must verify ownership of the website before accessing its data and tools.
Step 2: Add Your Website
After opening Search Console, use the property selector to add your website.
Google provides two main property types:
Domain property
Example:
example.com
A Domain property covers the domain’s subdomains and both HTTP and HTTPS versions. Domain properties are verified using DNS.
URL-prefix property
Example:
A URL-prefix property covers only the specified URL prefix and its paths.
For most website owners who control their domain’s DNS, a Domain property is a useful choice because it provides broader coverage.
How to Verify Your Website
Google requires ownership verification because Search Console provides access to private search data and allows users to perform actions that can affect how a website appears in Google Search.
Depending on your property and setup, Google may offer several verification methods.
These can include:
- DNS verification
- HTML file upload
- HTML meta tag
- Google Analytics
- Google Tag Manager
For a Domain property, DNS verification is required. URL-prefix properties can use other available methods.
DNS Verification
When using a Domain property, Google gives you a DNS record, usually a TXT record.
You need to:
- Copy the verification record from Search Console.
- Log in to your domain registrar or DNS provider.
- Open your DNS management area.
- Add the TXT record provided by Google.
- Save the record.
- Return to Search Console.
- Click Verify.
DNS changes can sometimes take time to become visible, so don’t worry if verification does not happen immediately.
Google Search Console Dashboard
Once your website is verified, you will see the Search Console dashboard.
The exact reports available can vary depending on your website and its search features.
Important areas include:
- Overview
- Performance
- URL Inspection
- Page Indexing
- Sitemaps
- Core Web Vitals
- HTTPS
- Security Issues
- Manual Actions
- Enhancements and search appearance reports
The URL Inspection search bar is particularly useful because it allows you to investigate individual URLs.
Step 1: Submit Your XML Sitemap
One of the first things you should do after setting up Search Console is submit your XML sitemap.
A sitemap helps Google discover important URLs on your website.
Google supports several sitemap formats, and modern content management systems such as WordPress can automatically generate sitemaps.
For many WordPress websites, your sitemap may be available at a URL similar to:
However, the exact sitemap URL depends on your WordPress setup and SEO plugins.
How to Submit a Sitemap
Go to:
Search Console → Sitemaps
Enter the sitemap URL and click Submit.
After submission, Search Console will show information about the sitemap and Google’s ability to read it.
Remember that submitting a sitemap does not guarantee that every URL will be indexed. Google decides which URLs to crawl and index based on many factors.
Google recommends using sitemaps to provide the URLs you want to appear in search results, particularly their canonical versions.
Step 2: Understand the Performance Report
The Performance report is one of the most valuable parts of Google Search Console.
It helps you understand how your website performs in Google Search.
The main metrics include:
Clicks
Clicks represent visits to your website from Google Search.
If your website receives 500 clicks, that means users clicked search results leading to your site 500 times during the selected reporting period.
Impressions
An impression occurs when your website appears in Google’s search results and is shown to a user according to Google’s measurement rules.
A high number of impressions means Google is showing your website frequently.
Click-Through Rate
CTR stands for click-through rate.
The basic calculation is:
CTR = Clicks ÷ Impressions × 100
For example, if your page receives 1,000 impressions and 50 clicks:
50 ÷ 1,000 × 100 = 5% CTR
CTR can help you evaluate how effectively your search result attracts clicks.
Average Position
Average position provides an aggregated view of where your website appeared in Google Search.
A lower numerical position generally means a better search position.
However, don’t judge your SEO performance using average position alone. Search results can vary by query, location, device, personalization, and other factors.
How to Find Your Best Keywords
Search Console can show the search queries that led to impressions and clicks for your website.
Go to:
Performance → Search results → Queries
You can sort the table by:
- Clicks
- Impressions
- CTR
- Position
Google’s Performance report allows you to analyze queries and other dimensions to understand which searches are associated with your website’s visibility.
Look for keywords where your website has:
High impressions + low CTR
These keywords may represent opportunities to improve your title and meta description.
Also look for:
Good impressions + position around 5–20
These pages may already have search visibility and could potentially benefit from better content, internal linking, improved search intent alignment, or stronger on-page SEO.
Step 3: Use the URL Inspection Tool
The URL Inspection tool is extremely useful when troubleshooting individual pages.
You can enter a complete URL into the inspection bar at the top of Search Console.
The tool can show what Google knows about that URL and can help you investigate indexing and crawling issues. It can also test the live version of the page.
For example, suppose you publish:
You can enter that URL into Search Console.
Google may show information such as:
- Whether the URL is indexed
- Whether indexing is allowed
- Canonical information
- Last crawl information
- Page availability
- Sitemap information
- Mobile-related information
- Rich result information where applicable
How to Request Indexing
If you publish a new page or significantly update an existing page, you can use URL Inspection.
Enter the URL and select Request indexing when the option is available.
Google explains that requesting indexing can be useful for individual pages, but it does not guarantee immediate indexing or ranking.
Don’t request indexing repeatedly every time you make a tiny change.
Instead, use it when you have published important new content or made a substantial update.
For larger numbers of URLs, Google recommends using a sitemap rather than requesting indexing individually.
Step 4: Check the Page Indexing Report
The Page Indexing report helps you understand which pages Google has indexed and which pages are not indexed.
You may see statuses such as:
- Indexed
- Not indexed
- Error-related issues
- Duplicate pages
- Redirected URLs
- Pages blocked from indexing
Google emphasizes that you should not expect every URL on your website to be indexed. Your primary goal should be ensuring that your important, canonical pages are properly indexed.
Common Reasons a Page Is Not Indexed
A page may not be indexed because:
- It contains a
noindexdirective. - It is blocked by robots.txt in relevant circumstances.
- Google considers it a duplicate.
- The page redirects to another URL.
- Google has not discovered or crawled it yet.
- The page has technical accessibility problems.
- Google determines that the URL does not need to be indexed.
If an important page isn’t indexed, use URL Inspection to investigate the specific URL.
Step 5: Understand Crawling and Indexing
Beginners often confuse crawling, indexing, and ranking.
They are different processes.
Crawling
Googlebot discovers and accesses URLs.
Google can discover URLs through links, sitemaps, and other sources.
Indexing
Google analyzes a crawled page and may store it in Google’s index.
An indexed page can potentially appear in Google Search if it meets Google’s requirements.
Ranking
When someone searches on Google, Google determines which eligible pages should appear and in what order.
Therefore, simply submitting a sitemap or requesting indexing does not guarantee high rankings.
Step 6: Monitor Core Web Vitals
Google Search Console also provides Core Web Vitals reports for eligible websites.
Core Web Vitals focus on aspects of real-world page experience, including:
- Loading performance
- Interactivity
- Visual stability
The report can help identify URLs that may need technical performance improvements.
For WordPress websites, common performance improvements include:
- Optimizing images
- Using efficient caching
- Reducing unnecessary plugins
- Improving hosting performance
- Minifying or optimizing assets where appropriate
- Using a content delivery network when appropriate
- Removing unnecessary scripts
Remember that improving website performance is useful for users as well as search engines.
Step 7: Check Mobile Performance
Most modern websites need to provide a good experience on mobile devices.
Make sure your WordPress website:
- Uses a responsive theme.
- Has readable text.
- Provides adequate spacing between clickable elements.
- Avoids unnecessary horizontal scrolling.
- Loads efficiently.
- Displays important content correctly on smaller screens.
Search Console can help identify website experience issues, but you should also manually test your site on real mobile devices.
Step 8: Monitor HTTPS
HTTPS is essential for modern websites.
Make sure your WordPress website uses a valid SSL certificate and that your preferred version of the site consistently uses HTTPS.
For example, if your preferred website is:
you should avoid creating unnecessary competing versions of the same page through inconsistent HTTP/HTTPS configuration.
After moving from HTTP to HTTPS, make sure your redirects, canonical URLs, internal links, sitemap, and Search Console properties are configured correctly.
Step 9: Check Security Issues and Manual Actions
Search Console can alert website owners to certain problems that may affect their presence in Google Search.
Two important areas are:
Security Issues
Security problems can occur when a website has been compromised or contains harmful content.
If Search Console reports a security issue, investigate it immediately.
Manual Actions
A manual action can occur when Google’s spam policies have been violated and a human reviewer has determined that action is necessary.
If you see a manual action, carefully read Google’s explanation and follow the recommended steps to resolve the issue.
How to Use Google Search Console for WordPress SEO
If you use WordPress, Search Console can become part of your regular SEO workflow.
A simple workflow looks like this:
Before publishing
Research your target topic and search intent.
Create useful, original content that satisfies the user’s needs.
After publishing
Add appropriate internal links and make sure the page is accessible.
Confirm that the page is included in your sitemap when appropriate.
After Google discovers the page
Use URL Inspection to check the page if necessary.
After receiving search data
Review:
- Queries
- Impressions
- Clicks
- CTR
- Average position
- Top pages
Then use that information to improve your content.
For example, you may discover that a blog post is appearing for several keywords that you didn’t originally target.
You can analyze those queries and improve the article so it provides better answers for users searching those topics.
7 SEO Strategies Using Google Search Console
Here are seven practical ways to use Search Console for SEO.
1. Find High-Impression, Low-CTR Pages
Find pages receiving many impressions but relatively few clicks.
Review their titles and descriptions.
Make sure the search result accurately communicates the value of the page.
2. Find Keywords Ranking on Page Two
Look for relevant queries where your pages appear around positions 11–20.
These pages can sometimes be strong candidates for SEO improvement.
Improve the content rather than simply adding keywords.
3. Discover New Keyword Opportunities
Search Console may reveal queries you weren’t intentionally targeting.
Use these queries to understand what your audience actually wants.
Then update your content where those topics genuinely fit.
4. Identify Pages Losing Traffic
Compare different date ranges in the Performance report.
If clicks or impressions decline, investigate the affected pages and queries.
Consider changes in:
- Search demand
- Competition
- Content quality
- Search intent
- Technical SEO
- Website changes
- Seasonality
5. Find Indexing Problems
Regularly check important pages using Page Indexing and URL Inspection.
Fix problems that prevent valuable pages from being crawled or indexed.
6. Analyze Mobile Search
Use device filters in the Performance report to compare mobile and desktop performance.
If mobile performance is significantly different, investigate the mobile experience.
7. Track SEO Improvements
Don’t change everything at once.
Make specific improvements and compare performance over time.
This makes it easier to understand which SEO changes are helping.
Common Google Search Console Mistakes Beginners Make
Mistake 1: Expecting Immediate Rankings
Submitting a sitemap doesn’t mean your page will immediately rank.
Indexing and ranking are separate processes.
Mistake 2: Checking Search Console Every Hour
SEO data doesn’t need to be monitored constantly.
Google’s reports can have processing delays, and meaningful SEO changes usually require time.
Mistake 3: Trying to Index Every URL
Not every URL needs to appear in Google.
Focus on valuable, canonical pages.
Mistake 4: Focusing Only on Keywords
Search Console provides keyword data, but successful SEO isn’t simply about inserting keywords into content.
Focus on relevance, usefulness, search intent, technical accessibility, and user experience.
Mistake 5: Ignoring Technical Problems
Great content cannot perform properly if Google cannot access or understand important pages.
Regularly investigate indexing and technical issues.
How Often Should You Check Google Search Console?
For a small WordPress website, checking Search Console once or twice a month can be enough for routine monitoring.
You should check it more frequently when:
- Launching a new website
- Publishing a large amount of content
- Redesigning your website
- Migrating to a new domain
- Changing URL structures
- Moving from HTTP to HTTPS
- Experiencing a sudden traffic drop
- Fixing technical SEO problems
Google also recommends reviewing indexing information periodically rather than constantly monitoring it when nothing significant has changed.
Google Search Console vs Google Analytics
Google Search Console and Google Analytics serve different purposes.
Google Search Console helps you understand:
- Google Search visibility
- Search queries
- Impressions
- Organic clicks
- Search CTR
- Average position
- Indexing
- Crawling
- Search-related technical problems
Google Analytics helps you understand what users do on your website after arriving, such as engagement, traffic sources, and conversions.
Using both tools together can give you a much more complete picture of your website.
Final Google Search Console Checklist
If you’re new to Search Console, follow this checklist:
☐ Create or sign in to your Google account
☐ Add your website to Google Search Console
☐ Verify website ownership
☐ Choose the appropriate property type
☐ Submit your XML sitemap
☐ Check the Page Indexing report
☐ Inspect important URLs
☐ Request indexing for important newly published pages when appropriate
☐ Review Search Performance data
☐ Analyze clicks and impressions
☐ Find valuable search queries
☐ Review pages with low CTR
☐ Check Core Web Vitals
☐ Monitor HTTPS and website experience
☐ Review Security Issues and Manual Actions
☐ Investigate major changes in organic search performance
☐ Improve your content based on actual search data
Conclusion
Google Search Console is one of the most useful free SEO tools available to website owners. It provides valuable information about how Google discovers, crawls, indexes, and displays your website in search results.
For beginners, you don’t need to master every report immediately. Start with the basics: verify your website, submit your sitemap, inspect important URLs, monitor indexing, and study the Performance report.
As your website grows, use Search Console data to identify new keyword opportunities, improve underperforming pages, investigate indexing problems, monitor technical SEO, and measure your organic search progress.
The most important thing to remember is that Google Search Console does not magically improve your rankings. Instead, it gives you the information you need to make better SEO decisions.
If you consistently publish useful content, maintain a technically accessible website, analyze your search data, and improve pages based on what you learn, Google Search Console can become an essential part of your long-term SEO strategy.
For official documentation and training, use Google Search Console Help and Google Search Central.