


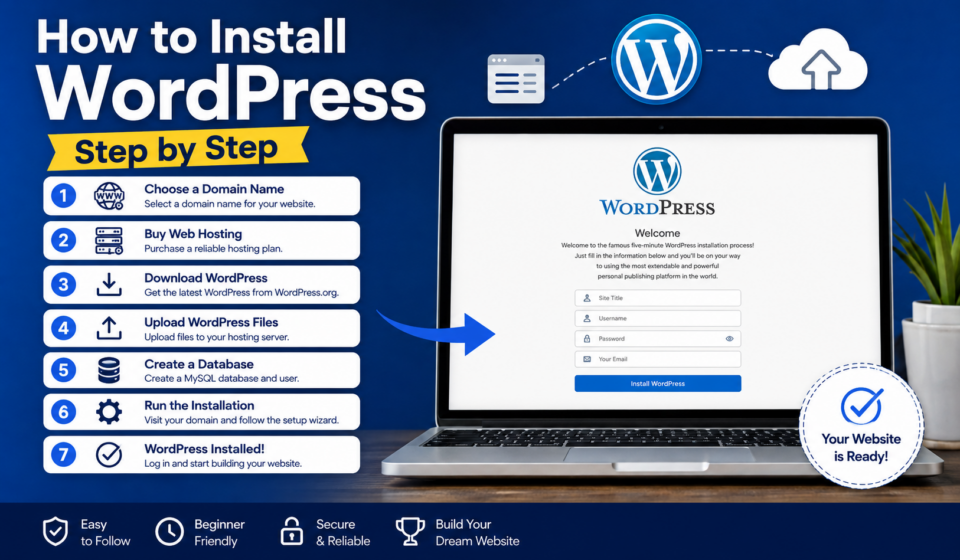
How to Install WordPress Step by Step
If you’re planning to build a website, blog, online store, portfolio, or business site, WordPress is one of the best platforms you can choose. It powers over 40% of all websites on the internet, making it the world’s most popular content management system (CMS).
The good news? Installing WordPress is much easier than many beginners think.
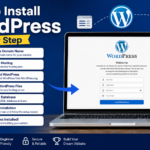
In this comprehensive guide, you’ll learn how to install WordPress step by step, whether you’re using one-click installation through your hosting provider or installing it manually. By the end of this tutorial, you’ll have a fully functional WordPress website ready for customization.
Why Choose WordPress?
Before installing WordPress, it’s worth understanding why millions of people use it.
WordPress is:
- Free and open source
- Beginner-friendly
- SEO-friendly
- Mobile responsive
- Highly customizable
- Supported by thousands of themes and plugins
- Perfect for blogs, business websites, portfolios, and eCommerce
Whether you’re a student, freelancer, entrepreneur, or business owner, WordPress provides everything you need to create a professional website.
What You Need Before Installing WordPress
Before starting, prepare the following:
1. A Domain Name
This is your website address.
Example:
- yourwebsite.com
- mybusiness.com
Choose a domain that’s:
- Easy to remember
- Short
- Brandable
- Relevant to your niche
2. Web Hosting
Hosting stores your website files online.
Most hosting providers offer:
- Free SSL certificate
- One-click WordPress installation
- Email accounts
- Automatic backups
- Security features
Popular hosting companies include:
- Hostinger
- SiteGround
- Bluehost
- Namecheap
- DreamHost
3. Internet Connection
Since WordPress installation happens online, ensure you have a stable internet connection.
Different Ways to Install WordPress
There are several methods.
Method 1
One-Click Installation (Recommended)
Best for beginners.
Method 2
Manual Installation
Suitable for advanced users.
Method 3
Local Installation
Perfect for learning and development.
In this guide, we’ll cover all three.
Method 1: Install WordPress Using One-Click Installer
This is the easiest method.
Most hosting companies use:
- Softaculous
- Installatron
- WordPress Toolkit
The process is almost identical.
Step 1: Log into Your Hosting Account
Visit your hosting dashboard.
Sign in using your account credentials.
Step 2: Open cPanel or Hosting Dashboard
Depending on your hosting provider, you’ll see:
- cPanel
- hPanel
- Custom dashboard
- DirectAdmin
Look for:
WordPress
or
Softaculous Apps Installer
Step 3: Click WordPress
Select:
Install WordPress
You’ll now see the installation form.
Step 4: Choose Installation URL
Select:
Protocol:
- https:// (Recommended)
Choose your domain.
Example:
Leave the directory empty if you want WordPress on the homepage.
Example:
Correct:
Incorrect:
Step 5: Enter Website Information
Fill in:
Website Name
Example:
Apel Digital Academy
Website Description
Example:
Learn Web Design and WordPress
These can be changed later.
Step 6: Create Admin Login
Choose:
Username
Example:
adminapel
Avoid:
admin
Password
Create a strong password.
Use:
- Uppercase letters
- Lowercase letters
- Numbers
- Symbols
Email Address
Use an email you regularly check.
This will be used for:
- Password reset
- Notifications
- Updates
Step 7: Select Language
Choose your preferred language.
Example:
English
Step 8: Click Install
Wait 1–2 minutes.
WordPress will install automatically.
You’ll receive:
Website URL
Example:
Admin URL
Example:
Congratulations!
WordPress is now installed.
Logging into WordPress
Visit:
yourwebsite.com/wp-admin
Enter:
Username
Password
Click:
Log In
You’ll now enter the WordPress Dashboard.
Understanding the WordPress Dashboard
The dashboard is your website’s control panel.
Important sections include:
Dashboard
Overview of your website.
Posts
Create blog articles.
Media
Upload images and videos.
Pages
Create pages like:
- Home
- About
- Contact
Appearance
Customize themes.
Plugins
Add new features.
Users
Manage website users.
Settings
Control website configuration.
Method 2: Manual WordPress Installation
Advanced users sometimes prefer manual installation.
Here’s how.
Step 1: Download WordPress
Visit the official WordPress website.
Download the latest version.
Extract the ZIP file.
Step 2: Create Database
Open:
cPanel
Click:
MySQL Database Wizard
Create:
- Database
- Username
- Password
Grant:
All Privileges
Save these details.
Step 3: Upload WordPress Files
Open:
File Manager
Navigate to:
public_html
Upload:
wordpress.zip
Extract the files.
Move everything inside the WordPress folder into public_html if necessary.
Step 4: Visit Your Domain
Open:
yourwebsite.com
WordPress setup begins.
Step 5: Enter Database Information
Fill in:
Database Name
Database Username
Database Password
Database Host
Usually:
localhost
Table Prefix
Default:
wp_
For extra security, you may use a custom prefix.
Example:
apel_
Step 6: Run Installation
Click:
Run Installation
Step 7: Website Information
Enter:
Site Title
Username
Password
Click:
Install WordPress
Done!
Method 3: Install WordPress on Localhost
If you’re learning WordPress, localhost is ideal.
Popular software:
- XAMPP
- Local
- WAMP
- MAMP
Basic steps:
- Install XAMPP.
- Start Apache and MySQL.
- Download WordPress.
- Copy files into the htdocs folder.
- Create a database using phpMyAdmin.
- Visit localhost/your-folder.
- Complete installation.
Now you have a WordPress site running on your computer.
Essential Settings After Installation
Installing WordPress is just the beginning.
Configure these settings immediately.
1. Change Site Title
Go to:
Settings → General
Update:
- Site Title
- Tagline
2. Set Permalinks
Go to:
Settings → Permalinks
Choose:
Post Name
Example:
yourwebsite.com/how-to-install-wordpress
This improves SEO.
3. Delete Default Content
Remove:
- Hello World post
- Sample Page
- Default Comment
4. Install a Theme
Navigate to:
Appearance → Themes
Click:
Add New
Choose a professional theme.
Popular free themes:
- Astra
- Kadence
- GeneratePress
- Blocksy
- Neve
5. Install Essential Plugins
Recommended plugins:
- Yoast SEO
- Rank Math
- Elementor
- LiteSpeed Cache
- Wordfence Security
- UpdraftPlus
- WPForms Lite
Install only what you need to keep your website fast.
6. Enable SSL
Ensure your website loads with:
https://
A secure website improves:
- SEO
- User trust
- Security
7. Create Important Pages
Start with:
- Home
- About
- Contact
- Privacy Policy
- Blog
8. Create Your First Blog Post
Go to:
Posts → Add New
Write your first article.
Add:
- Featured image
- Categories
- Tags
- Meta description
Publish.
Congratulations!
You’re officially a blogger.
Common Installation Problems
White Screen
Usually caused by:
- Theme issues
- Plugin conflicts
- Memory limits
Database Connection Error
Check:
- Database name
- Username
- Password
- Database host
404 Errors
Go to:
Settings → Permalinks
Click:
Save Changes
Login Problems
Reset your password using the “Lost your password?” link or through your hosting control panel if necessary.
Tips for Beginners
To build a successful WordPress website:
- Update WordPress regularly.
- Keep themes and plugins updated.
- Use strong passwords.
- Install a security plugin.
- Back up your website frequently.
- Avoid installing too many plugins.
- Optimize images before uploading.
- Publish valuable content consistently.
- Learn basic SEO practices.
- Monitor website performance.
These habits will help keep your site secure, fast, and user-friendly.
Frequently Asked Questions (FAQs)
Is WordPress free?
Yes. The WordPress software is free to download and use. You only need to pay for hosting and a domain name.
How long does WordPress installation take?
With a one-click installer, the process typically takes less than five minutes.
Can I install WordPress without coding?
Absolutely. Most users build complete websites without writing any code.
Which installation method is best?
For beginners, the one-click installer provided by your hosting company is the easiest and fastest option.
Can I change my theme later?
Yes. You can switch themes at any time without reinstalling WordPress, though you may need to adjust your site’s design.
Final Thoughts
Installing WordPress is a straightforward process that opens the door to creating virtually any type of website. Whether you use a hosting provider’s one-click installer, perform a manual installation, or set up WordPress on your local computer for practice, the key steps are the same: choose reliable hosting, configure your site correctly, and secure it from the start.
Once your installation is complete, focus on selecting a quality theme, installing only essential plugins, setting SEO-friendly permalinks, and publishing valuable content. With consistent updates and regular backups, your WordPress website will remain secure, fast, and ready to grow with your goals.
If this is your first website, don’t worry about making everything perfect on day one. Start simple, learn as you go, and you’ll soon be confident managing and expanding your WordPress site like a professional.
